Automate Your License Stubs and Get More Done

Like most developers, I have several software development roles. Though I take great joy in my open-source projects, commercial software-development keeps the lights on. More so than with my open-source software, I am often required to place license-stubs at the top of source-code files that I create. Unfortunately, I’m so concerned with getting things done, that I often completely forget to do it. That leaves me with the unsettling choice to either keep going, or to stop working on things just to insert commented text in a bunch of files that are largely internal.

Naturally I would prefer to use a tool that can work over all files in the tree, and ignore any files in which there already exists a stub. It would also need to account for things like shebangs or opening PHP tags, and insert the license content after those.

The plicense (stands for “prepend license”) tool can be used for this. It is available as “plicense” under pip. As an added bonus, it can also treat the license-stub like a template, and automatically substitute things like the year and the author so that you need not update your template every year.

Here is an example of how to use it, right out of the documentation. This is being done in a project that has scripts that need to be processed differently than the rest of the files due to the difference in naming.

  1. Process my scripts/ directory. The files in this directory don’t have extensions. However, I can’t run plicense over the whole tree, or I’ll be including virtualenv and git files, which should be ignored.
    beantool$ plicense -p scripts -r author "Dustin Oprea" LICENSE_STUB 
    scripts/bt
    (1)/(1) directories scanned.
    (1)/(1) files scanned.
    (1)/(1) of the found files needed the stub.
    

    The top portion of the script now looks like:

    #!/usr/bin/env python2.7
    
    # beantool: Beanstalk console client.
    # Copyright (C) 2014  Dustin Oprea
    # 
    # This program is free software; you can redistribute it and/or
    # modify it under the terms of the GNU General Public License
    # as published by the Free Software Foundation; either version 2
    # of the License, or (at your option) any later version.
    
    
    import sys
    sys.path.insert(0, '..')
    
    import argparse
    
  2. Process the Python files in the rest of the tree.

    beantool$ plicense -p beantool -e py -r author "Dustin Oprea" -f __init__.py LICENSE_STUB 
    beantool/job_terminal.py
    beantool/handlers/handler_base.py
    beantool/handlers/job.py
    beantool/handlers/server.py
    beantool/handlers/tube.py
    (2)/(2) directories scanned.
    (5)/(7) files scanned.
    (5)/(5) of the found files needed the stub.
    

    If you run it again, you’ll see that nothing is done:

    beantool$ plicense -p beantool -e py -r author "Dustin Oprea" -f __init__.py LICENSE_STUB 
    (2)/(2) directories scanned.
    (5)/(7) files scanned.
    (0)/(5) of the found files needed the stub.
    

Easy and Loveable Cartesian Products in Python

Use more than one for in the same list comprehension:

[(i, j, k) 
 for i in (11, 22, 33) 
 for j in (44, 55, 66) 
 for k in (77, 88, 99)]

This results in all possible permutations (a cartesian product), where enumeration starts on the right:

[(11, 44, 77), (11, 44, 88), (11, 44, 99), 
 (11, 55, 77), (11, 55, 88), (11, 55, 99), 
 (11, 66, 77), (11, 66, 88), (11, 66, 99), 

 (22, 44, 77), (22, 44, 88), (22, 44, 99), 
 (22, 55, 77), (22, 55, 88), (22, 55, 99), 
 (22, 66, 77), (22, 66, 88), (22, 66, 99), 

 (33, 44, 77), (33, 44, 88), (33, 44, 99), 
 (33, 55, 77), (33, 55, 88), (33, 55, 99), 
 (33, 66, 77), (33, 66, 88), (33, 66, 99)]

Monitor Application Events in Real-Time

There are few applications created in today’s world that achieve scalability and/or profitability without thoughtful reporting. The key is to be able to push a massive number of tiny, discrete events, and to both aggregate them and view them in near real-time. This allows you to identify bottlenecks and trends.

This is where the statsd project (by etsy) and the Graphite project (originally by Orbitz) comes in. A statsd client allows you to push and forget as many events as you’d like to the statsd server (using UDP, which is connectionless, but aggressive). The statsd server pushes them to Carbon (the storage backend for Graphite). Carbon stores to a bunch of Whisper-format files.

When you wish to actually watch, inspect, or export the graphs, you’ll use the Graphite frontend/dashboard. The frontend will establish a TCP connection to the backend in order to read the data. The Graphite frontend is where the analytical magic happens. You can have a bunch of concurrent charts automatically refreshing. Graphite is simply a pluggable backend (and, in fact, the default backend) of statsd. You can use another, if you’d like.

The purpose of this post is to not necessary spread happiness or usage examples about statsd/Graphite. There’s enough of that. However, as painful as the suite is to set-up in production, it’s equally difficult just to freaking get it running just for development. The good news is that there is an enormous following and community for the components, and that they are popular and well-used. The bad news is that issues and pull-requests for Graphite seems to be completely ignored by the maintainers. Worse, there are almost no complete or accurate examples of how to install statsd, Carbon, and Graphite. It can be very discouraging for people that just want to see how it works. I’m here to help.

These instructions work for both Ubuntu 13.10 and 14.04, and OS X Mavericks using Homebrew.

Installing Graphite and Carbon

Install a compatible version of Django (or else you’ll see the ‘daemonize’ error, if not others):

$ sudo pip install Django==1.4 graphite-web carbon

This won’t install some/all of the dependencies. Finish-up by installing a dependency for Graphite:

$ sudo apt-get install libcairo-dev

If you’re using Homebrew, install the “cairo” package.

Finish-up the dependencies by installing with the requirements file:

$ sudo pip install -r https://raw.githubusercontent.com/graphite-project/graphite-web/master/requirements.txt

If you’re running on OS X and get an error regarding “xcb-shm” and “cairo”, you’ll have to make sure the pkgconfig script for xcb-shm is in scope, as it appears to be preinstalled with OS X in an unconventional location:

$ PKG_CONFIG_PATH=/opt/X11/lib/pkgconfig pip install -r https://raw.githubusercontent.com/graphite-project/graphite-web/master/requirements.txt 

It’s super important to mention that graphite only works with Twisted 11.1.0 . Though the requirements will install this, any other existing version of Twisted will remain installed, and may preempt the version that we actually require. Either clean-out any other versions beforehand, or use a virtualenv.

Configure your installation:

$ cd /opt/graphite
$ sudo chown -R dustin.dustin storage
$ PYTHONPATH=/opt/graphite/webapp django-admin.py syncdb --settings=graphite.settings

Answer “yes” when asked if you should create a superuser, and provide credentials.

Use default configurations:

$ sudo cp conf/carbon.conf.example conf/carbon.conf
$ sudo cp conf/storage-schemas.conf.example conf/storage-schemas.conf
$ sudo cp webapp/graphite/local_settings.py.example webapp/graphite/local_settings.py

Edit webapp/graphite/settings.py and set “SECRET_KEY” to a random string:

Make sure “WHISPER_FALLOCATE_CREATE” is set to “False” in conf/carbon.conf .

Start Carbon:

$ bin/carbon-cache.py start
/usr/lib/python2.7/dist-packages/zope/__init__.py:3: UserWarning: Module twisted was already imported from /usr/local/lib/python2.7/dist-packages/twisted/__init__.pyc, but /opt/graphite/lib is being added to sys.path
  import pkg_resources
Starting carbon-cache (instance a)

Start Graphite with development-server script:

$ bin/run-graphite-devel-server.py /opt/graphite
Running Graphite from /opt/graphite under django development server

/usr/local/bin/django-admin.py runserver --pythonpath /opt/graphite/webapp --settings graphite.settings 0.0.0.0:8080
Validating models...

0 errors found
Django version 1.4, using settings 'graphite.settings'
Development server is running at http://0.0.0.0:8080/
Quit the server with CONTROL-C.
No handlers could be found for logger "cache"
[03/May/2014 16:23:48] "GET /render/?width=586&height=308&_salt=1399152226.921&target=stats.dustin-1457&yMax=100&from=-2minutes HTTP/1.1" 200 1053

Obviously this script is not meant for the production use of Django, but it’ll be fine for development. You can open the Graphite dashboard at:

http://localhost:8080/

Since the development server binds on all interfaces, you can access it from a non-local system as well.

Installing statsd

Install node.js:

$ sudo apt-get install nodejs

If you’re using Brew, install the “node” package.

We’ll put it in /opt just so that it’s next to Graphite:

$ cd /opt
$ sudo git clone https://github.com/etsy/statsd.git
$ cd statsd
$ sudo cp exampleConfig.js config.js

Update “graphiteHost” in config.js, and set it to “localhost”.

If you want to get some verbosity from statsd (to debug the flow, if needed), add “debug” or “dumpMessages” with a boolean value of “true” to config.js.

To run statsd:

$ node stats.js config.js
17 Jul 22:31:25 - reading config file: config.js
17 Jul 22:31:25 - server is up

Using the statsd Python Client

$ sudo pip install statsd

Sample Python script:

import time
import random

import statsd

counter_name = 'your.test.counter'
wait_s = 1

while 1:
    c = statsd.StatsClient('localhost', 8125)
    
    random_count = random.randrange(1, 100)
    print("Count=(%d)" % (random_count))

    while random_count > 0:
        c.incr(counter_name)
        random_count -= 1
    
    time.sleep(wait_s)

This script will post a random number of events in clustered bursts, waiting for one second in between.

Using Graphite

Graphite is a dashboard that allows you to monitor many different charts simultaneously. Any of your events will immediately become available from the dashboard, though you’ll have to refresh it to reflect new ones.

When you first open the dashboard, there will be a tree on the left that represent all of the available events/metrics. These not only include the events that you sent, but statistics from Carbon and statsd, as well.

The chart representing the script above can be found under:

Graphite -> stats_counts -> your -> test -> counter

The default representation of the chart probably won’t usually make much sense. Change the following parameters:

  1. Click the “Graph Options” button (on the graph), click “Y-Axis” -> “Maximum”, and then set it to “100”.
  2. Click on the third button from the left at the top of the graph to view a tighter time period. Enter ten-minutes.

By default, you’ll have to manually press the button to update (the left-most one, at the top of the graph). There’s an “Auto-Refresh” button that can be clicked to activate an auto-refresh, as well.

If at some point you find that you’ve introduced data that you’d like to remove, stop statsd, stop Graphite, stop Carbon, identify the right Whisper file under /opt/graphite/storage/whisper and delete it, then start Carbon, start Graphite, and start statsd.

Using Nginx and Gunicorn

As if the difficulty of getting everything else working isn’t enough, Django is broken by default. It actually seems to depend on the gunicorn_django boot script, which is now obsolete.

Getting Graphite working hinges on the WSGI interface being available for Gunicorn.

You need to copy /opt/graphite/conf/graphite.wsgi.example to /opt/graphite/webapp/graphite, but you’ll need to name it so that it’s importable by Gunicorn (no periods exception for the extension). I call mine wsgi.py. You’ll also have to refactor how it establishes the application object.

This is the original two statements:

import django.core.handlers.wsgi
application = django.core.handlers.wsgi.WSGIHandler()

You’ll need to replace those two lines with:

from django.core.wsgi import get_wsgi_application
application = get_wsgi_application()

This should be the contents of your WSGI module, sans the commenting:

import os, sys
sys.path.append('/opt/graphite/webapp')
os.environ['DJANGO_SETTINGS_MODULE'] = 'graphite.settings'

from django.core.wsgi import get_wsgi_application
application = get_wsgi_application()

from graphite.logger import log
log.info("graphite.wsgi - pid %d - reloading search index" % os.getpid())
import graphite.metrics.search

From /opt/graphite/webapp/graphite, run the following:

$ sudo gunicorn -b unix:/tmp/graphite_test.gunicorn.sock wsgi:application

This is an example Nginx config, to get you going:

upstream graphite_app_server {
    server unix:/tmp/graphite_test.gunicorn.sock fail_timeout=0;
}

server {
    server_name graphite.local;
    keepalive_timeout 5;

    root /opt/graphite/webapp/graphite/content;

    location /static/ {
        try_files $uri 404;
    }

    location / {
        proxy_set_header X-Forwarded-For $proxy_add_x_forwarded_for;
        proxy_set_header Host $http_host;
        proxy_redirect off;

        proxy_pass   http://graphite_app_server;
    }
}

Troubleshooting

If you get the following, completely-opaque Gunicorn “Worker failed to boot” error, Google will only render a list of [probably] unrelated problems:

Traceback (most recent call last):
  File "/usr/local/bin/gunicorn", line 9, in 
    load_entry_point('gunicorn==19.0.0', 'console_scripts', 'gunicorn')()
  File "/Library/Python/2.7/site-packages/gunicorn/app/wsgiapp.py", line 74, in run
    WSGIApplication("%(prog)s [OPTIONS] [APP_MODULE]").run()
  File "/Library/Python/2.7/site-packages/gunicorn/app/base.py", line 166, in run
    super(Application, self).run()
  File "/Library/Python/2.7/site-packages/gunicorn/app/base.py", line 71, in run
    Arbiter(self).run()
  File "/Library/Python/2.7/site-packages/gunicorn/arbiter.py", line 169, in run
    self.manage_workers()
  File "/Library/Python/2.7/site-packages/gunicorn/arbiter.py", line 477, in manage_workers
    self.spawn_workers()
  File "/Library/Python/2.7/site-packages/gunicorn/arbiter.py", line 537, in spawn_workers
    time.sleep(0.1 * random.random())
  File "/Library/Python/2.7/site-packages/gunicorn/arbiter.py", line 209, in handle_chld
    self.reap_workers()
  File "/Library/Python/2.7/site-packages/gunicorn/arbiter.py", line 459, in reap_workers
    raise HaltServer(reason, self.WORKER_BOOT_ERROR)
gunicorn.errors.HaltServer: <HaltServer 'Worker failed to boot.' 3>

Technically, this probably means that just about anything could’ve gone wrong. However, If you forget to do the syncdb above or don’t replace those statements in the WSGI file, you’ll get this error. I’ll be happy if I can save you the time by mentioning it, here.

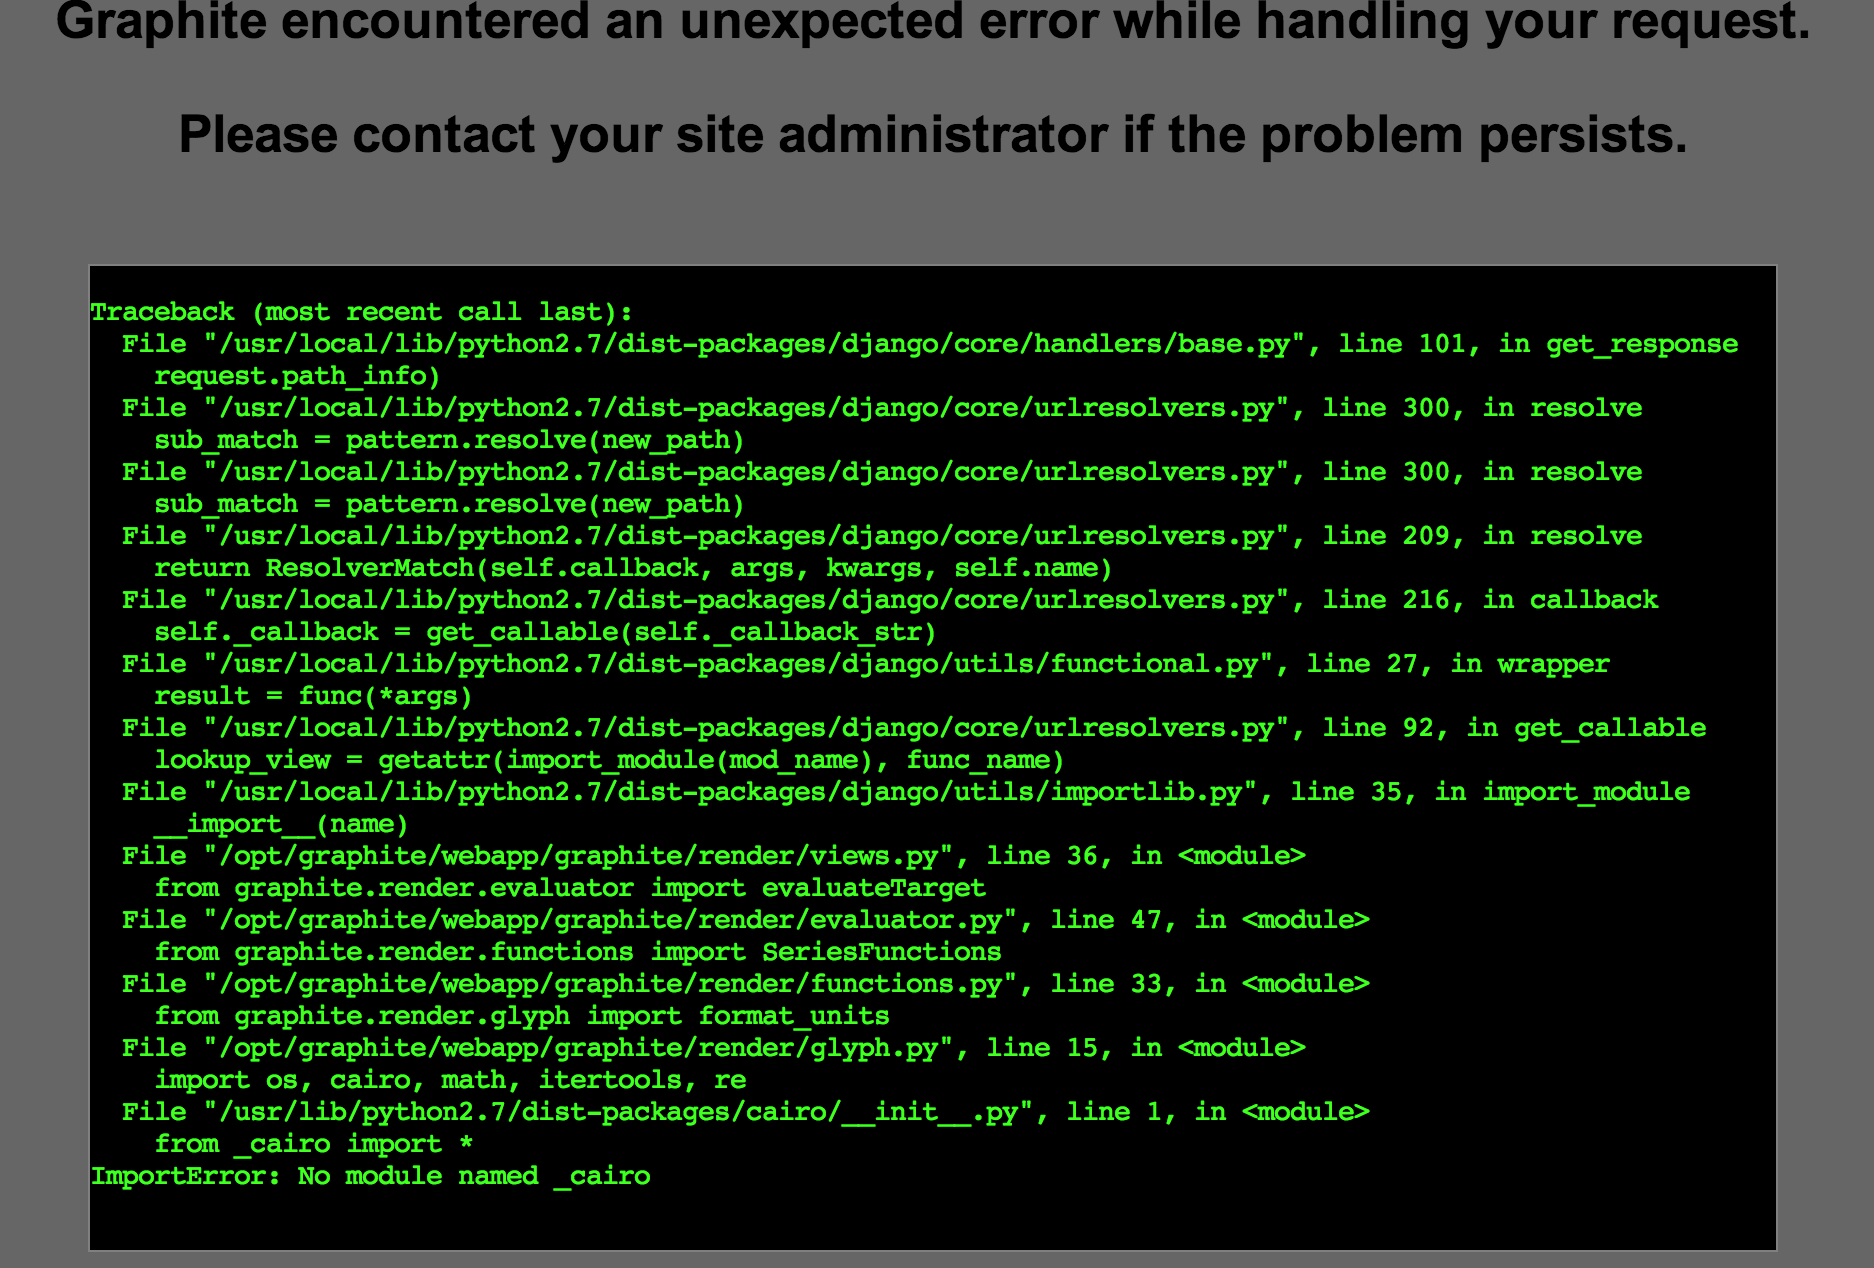
If you get a 500-error loading one or more dependencies for Graphite in the webpage, make sure debugging is turned-on in Gunicorn, and open that resource in another tab to see a stacktrace:

Graphite debugging

This particular error (“ImportError: No module named _cairo”) can be solved in Ubuntu by reinstalling a broken Python Cairo package:

$ sudo apt-get install --reinstall python-cairo

If you get Graphite running but aren’t receiving events, make sure that statsd is receiving the events from your client(s) by enabling its “dumpMessages” option in its config. If it is receiving the events, then check the /opt/graphite/storage/whisper directory. If there’s nothing in it (or it’s not further populating), then you have a file-permissions problem, somewhere (everything essentially needs to be running as the same user, and they all need access to that directory).

Link

Leap Motion for Gesture-Based Applications

https://www.leapmotion.com

There was even a pull-request to 2048 to introduce gesture support: https://github.com/gabrielecirulli/2048/pull/149

https://developer.leapmotion.com/documentation

Languages:

  • C++
  • C#
  • Objective-C
  • Java
  • Javascript
  • Python

Platforms:

  • Windows
  • OSX
  • Linux

There’s also potential investment funding for good ideas:

Leap Fund

Using ZeroMQ With Coroutines (gevent) Under Python

ZeroMQ (0MQ) is a beautiful library that basically replaces the socket layer with a very thin, pattern-based wrapper. Aside from removing this overhead from your code, 0MQ also usually gives you the guarantee that one read will return one message (or one part of a multipart message).

gevent is a coroutine-based networking library for Python. Coroutines allow you to leverage the blocking that certain types of operations, like network requests, to perform other operations while waiting (works best when you’re doing a number of similar operations in parallel). It’s a compromise that allows you to speed up synchronous operations to the point of being comparable to multithreading (at least in the case of network operations).

There was a point at which ZeroMQ didn’t support this (and a package named gevent_zmq had to be used), but it has since become compatible with it.

For example, a server:

import gevent

import zmq.green as zmq

_BINDING = 'ipc:///tmp/test_server'

context = zmq.Context()

def server():
    server_socket = context.socket(zmq.REP)
    server_socket.bind(_BINDING)

    while 1:
        received = server_socket.recv()
        print("Received:\n[%s]" % (received))
        print('')

        server_socket.send('TestResponse')

server = gevent.spawn(server)
server.join()

The corresponding client:

import gevent

import zmq.green as zmq

_BINDING = 'ipc:///tmp/test_server'

context = zmq.Context()

def client():
    client_socket = context.socket(zmq.REQ)
    client_socket.connect(_BINDING)

    client_socket.send("TestMessage")

    response = client_socket.recv()
    print("Response:\n[%s]" % (response))
    print('')

client = gevent.spawn(client)
client.join()

Displaying the output here would nearly be redundant, given that the result should be plainly obvious.

Python Modules Under OSX (10.9.2)

Recently, Apple released an update that broke every C-based Python package, and probably more (the “-mno-fused-madd” compilation error). See here for more information.

To fix, add these to your environment:

export CFLAGS=-Qunused-arguments
export CPPFLAGS=-Qunused-arguments

Then, add this to your sudoers file (via visudo), which will allow sudo to have access to those variables:

Defaults        env_keep += "CFLAGS CPPFLAGS"

Adding Custom Data to X.509 SSL Certificates

Signed SSL certificates have a feature known as “extensions”. In order for them to be there, they must be in the CSR. Therefore, CSR’s support them too. Although X.509 certificates are not meant for a lot of data and were never meant to act as databases (rather, an identity with associated information), they act as a great solution when you need to store secured information alongside your application at a client site. Though the data is viewable, you have the following guarantees:

  • The data (including the extensions) can not be interfered with, or it’ll fault its signatures.
  • The certificate will expire at a set time (and can be renewed if need be).
  • A certificate-revocation list (CRL) can be implemented (using a CRL distribution point, or “CDP”) so that you can invalidate a certificate remotely.

As long as you don’t care about keep the data secret, this makes extensions an ideal solution to a problem like on-site client licenses, where your software needs to regularly check whether the client still has permission to operate. You can also use a CRL to disable them if they stop paying their bill.

These extensions accommodate data that goes beyond the distinguished-name (DN) fields (locality, country, organization, common-name, etc..), chain of trust, key fingerprints, the signatures that guarantee the trustworthiness of the certificate (using the signature of the CA), and the integrity of the certificate (the signature of the certificate contents). Extensions seem relatively easy to add to certificates, whether you’re creating CSRs from code or from command-line. They’re just manageably-sized strings (though it technically seems like there is no official length limit) of human-readable text.

If you own the CA, then you might also create your own extensions. In this case, you’ll refer to your extension with a unique dotted identifier called an “OID” (we’ll go into this in the ASN.1 explanation below). Libraries might have trouble if you just refer to your own extension without properly registering it with your library prior. For example, OpenSSL has the ability to register and use custom extensions, but the M2Crypto SSL library doesn’t expose the registration call, and, therefore, can’t use custom extensions.

Unsupported extensions might be skipped or omitted from the signed certificate by a CA that doesn’t recognize/support them, so beware that you’ll need to stick to the popular extensions if you can’t use your own CA. Extensions that are mandatory for you requirements can be marked as “critical”, so that signing won’t precede if any of your extensions aren’t recognized.

The extension that we’re interested in, here, is “subjectAltName”, and it is recognized/supported by all CAs. This extension can describe the “alternative subjects” (using DNS-type entries) that you might need to specify if your X.509 needs to be used with more than one common-name (more than one hostname). It can also describe email-addresses and other kinds of identity information. However, it can also store custom text.

This is an example of two “subjectAltName” extensions (multiple instances of the same extensions can be present in a certificate):

DNS:server1.yourdomain.tld, DNS:server2.yourdomain.tld
otherName:1.3.6.1.4.1.99;UTF8:This is arbitrary data.

However, due to details soon to follow, it’s very difficult to pull the extension text back out, again. In order to go further, we have to take a quick diversion into certificate structure. This isn’t necessarily required, but it is information that is obscure-enough to find that you won’t have any coping skills if you encounter issues, otherwise.

Certificate Encoding

All of the standard, human-readable, SSL documents, such as the private-key, public-key, CSR, and X.509, are encoded in a format called PEM. This is base64-encoded data with anchors (e.g. “—–BEGIN DSA PRIVATE KEY—–“) on the top and bottom.

In order to have any use, a PEM-encoded document must be converted to a DER-encoded document. This just means that it’s stripped of the anchors and newlines, and then base64-decoded. DER is a tighter subset of “BER” encoding.

ASN.1 Encoding

The DER-encoding describes an ASN.1 data structure node. ASN.1 combines a tree of data with a tree of grammar specifications, and reduces down to hierarchical sets of DER-encoded data. All nodes (called “tags”) are represented by dot-separated identifiers called OIDs (mentioned above). Usually these are officially-assigned OIDs, but you might have some custom ones if you don’t have to pass your certificates to higher authority that might have a problem with them.

In order to decode the structure, you must walk it, applying the correct specs as required. There is nothing self-descriptive within the data. This makes it fast, but useless until you have enough pre-existing knowledge to descend to the information you require.

The specification for the common grammars (like RFC 2459 for X.509) in ASN.1 is so massive that you should expect to avoid getting involved in the mechanics at all costs, and to learn how to survive with the limited number of libraries already available. In all likelihood, a need for anything outside the realm of popular usage will require a non-trivial degree of debugging.

ASN.1 has been around… for a while (about thirty years, as of this year). It’s obtuse, impossible, and not understood in great deal by very few individuals. However, it’s going to be here for a while.

Extension Decoding

The reason that extensions are tough to decode is because the encoding depends on the text that you put in the extension. Specifically, the “otherName” and “UT8” parts. OpenSSL can’t present these values when it dumps the certificate, because it just doesn’t have enough information to decode them. M2Crypto, since it uses OpenSSL, has the same problem.

Now that we’ve introduced a little of the conceptual ASN.1 structure, let’s go back to the previous subjectAltName “otherName” example:

otherName:1.3.6.1.4.1.99;UTF8:This is arbitrary data.

The following is the breakdown:

  1. “otherName”: A classification of the subjectAltName extension that indicates custom-data. This has an OID of its own in the RFC 2459 grammar.
  2. 1.3.6.1.4.1.99: The OID of your company. The first eight parts comprise the common-prefix, combined with a “private enterprise number” (PEN). You can register for your own.
  3. Custom data, prefixed with a type. The “UTF8” prefix determines the encoding of the data, but is not itself included.

I used the following calls to M2Crypto to add these extensions to the X.509:

ext = X509.new_extension(
        'subjectAltName',
        'otherName:1.3.6.1.4.1.99;UTF8:This is arbitrary data.'
    )

ext.set_critical(1)
cert.add_ext(ext)

Aside from the extension information itself, I also indicate that it’s to be considered “critical”. Signing will fail if the CA doesn’t recognize the extension, and not simply omit it. When this gets encoded, it’ll be encoded as three separate “components”:

  1. The OID for the “otherName” type.
  2. The “critical” flag.
  3. A DER-encoded sequence of the PEN and the UTF8-encoded string.

It turns out that it’s quicker to use a library that specializes in ASN.1, rather than trying to get the information from OpenSSL. After all, it’s out-of-scope as it’s colocated with cryptographical data while not being cryptographical itself.

I used pyasn1.

Decoding Our Extension

To decode the string from the previous extension:

  1. Enumerate the extensions.
  2. Decode the third component (mentioned above) using the RFC 2459 “subjectAltName” grammar.
  3. Descend to the first component of the “SubjectAltName” node: the “GeneralName” node.
  4. Descend to the first component of the “General Name” node: the “AnotherName” nerve.
  5. Match the OID against the OID we’re looking for.
  6. Decode the string using the RFC 2459 UTF8 specification.

This is a dump of the structure using pyasn1:

SubjectAltName().
   setComponentByPosition(
       0, 
       GeneralName().
           setComponentByPosition(
               0, 
               AnotherName().
                   setComponentByPosition(
                       0, 
                       ObjectIdentifier(1.3.6.1.5.5.7.1.99)
                   ).
                   setComponentByPosition(
                       1, 
                       Any(hexValue='0309006465616462656566')
                   )
           )
   )

The process might seem easy, but this took some work (and collaboration) to get right, with the primary difficulty coming from obscurity meeting unfamiliarity. However, the process should be somewhat set in stone, every time.

This is the corresponding code. “cert” is an M2Crypto X.509 certificate:

cert, rest = decode(cert.as_der(), asn1Spec=rfc2459.Certificate())

extensions = cert['tbsCertificate']['extensions']
for extension in extensions:
    extension_oid = extension.getComponentByPosition(0)
    print("0 [%s]" % (repr(extension_oid)))

    critical_flag = extension.getComponentByPosition(1)
    print("1 [%s]" % (repr(critical_flag)))

    sal_raw = extension.getComponentByPosition(2)
    print("2 [%s]" % (repr(sal_raw)))

    (sal, r) = decode(sal_raw, rfc2459.SubjectAltName())
    
    gn = sal.getComponentByPosition(0)
    an = gn.getComponentByPosition(0)

    oid = an.getComponentByPosition(0)
    string = an.getComponentByPosition(1)

    print("[%s]" % (oid))

    # Decode the text.

    s, r = decode(string, rfc2459.UTF8String())

    print("Decoded: [%s]" % (s))
    print('')

Wrap Up

I wanted to provide an end-to-end tutorial in adding and retrieving “otherName”-type “subjectAltName” extensions because none currently exists. It’s a good solution for keeping data safe on someone else’s assets (as long as you don’t overburden the certificate with extensions, as it’ll decrease the efficiency to verify).

Don’t forget to implement the CRL/CDP, or you won’t have the possibility of faulting the certificate (and its extensions) without having to wait for them to expire.